A Comprehensive Guide: SSH Port Number and SSH Working
Table of Contents
- What Is a Port in SSH?
- How Does SSH (Secure Shell) Work on Port 22?
- SSH Port Forwarding: Complete Guide
- How to Generate an SSH Key?
- Commands to Manage the SSH on the Linux System
- How to SSH into a Linux Server
- How to Configure SSH Port Number 22 in Firewall UFW?
- SSH Implementations for Linux and Windows
- What Is the Default SSH Port Number?
- How to Change the Default SSH Port 22 to Another Port Number?
- Conclusion
The default SSH port number is 22 (TCP). SSH uses port 22 to establish encrypted connections between client and server.
In the modern digital era, the frequency of cyberattacks is increasing rapidly, including threats such as data breaches, hacking, and identity theft. To prevent these crimes, every organization requires techniques, such as SSH, to ensure secure data transmission between devices or computer systems. In this article, you will learn about SSH protocol, SSH Port Number, default SSH port and its working in detail. In addition, you will explore different encryption methods, authentication processes, commands, and key components that ensure secure communication over networks.
What Is a Port in SSH?
A “port” in networking is a logical or virtual endpoint for communication within a computer or network. Ports allow different services and applications to share the same physical network connection while maintaining separate communication channels.
Well-known ports ranging between (0–1023) are considered “reserved ports” for specific services, such as HTTP (port 80), HTTPS (port 443), FTP (port 21), and SSH (port 22). These standardized assignments help ensure consistency across networks.
The SSH port serves as a specific endpoint for Secure Shell protocol connections on a computer. By default, SSH uses port 22 when you run commands in Linux to communicate between two servers over the network. All communication goes through a designated port number, but you can change this port and assign it to any other available SSH port number. This flexibility is often used to improve security by reducing automated attacks targeting the default port.
Does SSH Use TCP or UDP?
SSH operates exclusively over TCP (Transmission Control Protocol), not UDP. TCP provides a reliable, connection-oriented communication channel, ensuring that all transmitted data is delivered in the correct order without loss or duplication.
This reliability is essential for SSH, as it is used for remote server management, command execution, and secure data transfer. When an SSH connection is established, a persistent TCP session is created between the client and the server—typically over port 22 or a custom port if configured.
Unlike UDP, which does not guarantee delivery or order of packets, TCP includes error checking, retransmission, and flow control mechanisms. Combined with SSH encryption, this ensures both data integrity and security, making TCP the only suitable transport protocol for standard SSH connections.
A “port” in networking is a logical or virtual endpoint for communication within a computer or network. Ports allow different services and applications to share the same physical network connection while maintaining separate communication channels.
Well-known ports ranging between (0-1023) are known as “reserved ports” for specific services, such as HTTP (port 80), HTTPS (port 443), FTP (port 21), and SSH (port 22). These standardized assignments help ensure consistency across networks.
The SSH port serves as a specific endpoint for Secure Shell protocol connections on a computer. By default, SSH uses port 22 when you run commands in Linux to communicate between two servers over the network.
All communication goes through a designated port number, but you can change this port and assign it to any other available SSH port number. They provide a secure and encrypted means to manage or access remote servers or devices, ensuring safe communication over potentially insecure networks.
How Does SSH (Secure Shell) Work on Port 22?
SSH works on a client-server model and facilitates secure and encrypted communication across network connections. It is extensively used in command-line tools such as remote login applications and terminals. Linux users prefer to use SSH port for remote access and server administration tasks. So, the following question arises: how does SSH work on Port 22?
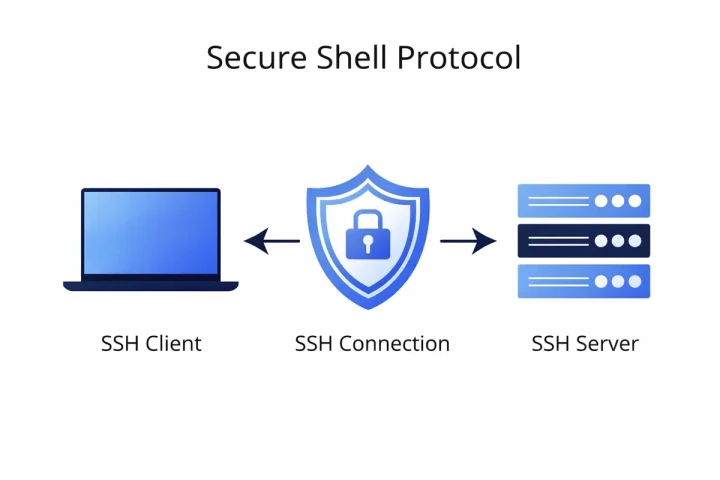
SSH uses port 22 to establish a secure and encrypted communication channel between a client and a server. Let’s discuss the SSH working in detail!
SSH Port Forwarding: Complete Guide
SSH port forwarding (also known as tunneling) is a method that allows you to securely redirect network traffic through an encrypted SSH connection. It creates a protected channel between your local machine and a remote server, enabling access to services that are not directly exposed or are restricted by firewalls. This approach is widely used to enhance security and safely transmit sensitive data over untrusted networks.
What is SSH port forwarding (tunneling)?
SSH tunneling works by encapsulating traffic from one port and forwarding it to another through an SSH session. Instead of connecting directly to a target service, your traffic passes through the SSH server, where it is encrypted and securely delivered to the destination. This makes it possible to use otherwise insecure protocols in a protected manner.
Types: Local, Remote, Dynamic
There are three primary types of SSH port forwarding:
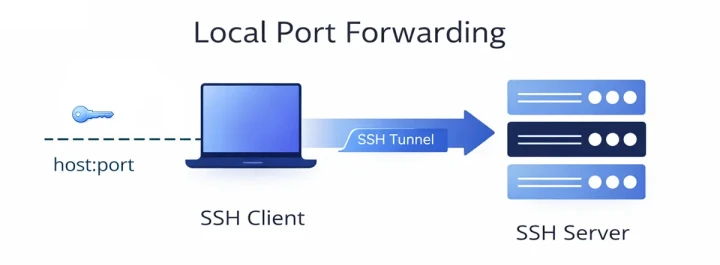
Local forwarding (-L) – redirects a local port to a remote host and port. It is commonly used to access services running on a remote server (e.g., databases or internal web apps) as if they were local.
Remote forwarding (-R) – forwards a port from the remote server to your local machine, allowing external users to access local services behind NAT or firewalls.
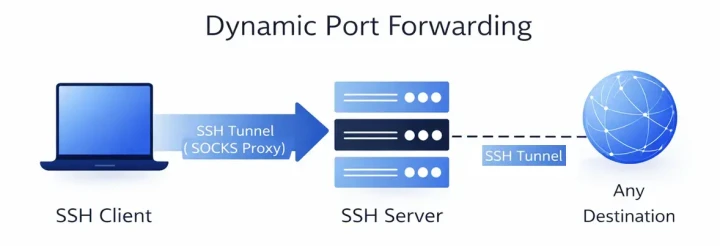
Dynamic forwarding (-D) – creates a SOCKS proxy, enabling flexible routing of traffic to multiple destinations via a single SSH connection.

Syntax examples
ssh-L local_port:destination:remote_port user@server
ssh-R remote_port:localhost:local_port user@server
ssh-D port user@server
Use cases
SSH port forwarding is commonly used in the following scenarios:
Bypassing firewalls and restrictions – securely access internal or blocked services through an SSH gateway. This approach is especially effective when using offshore VPS solutions, which provide fewer network restrictions and greater flexibility for routing traffic.
Secure database access – connect to databases bound to localhost without exposing them to the public internet. This is particularly useful in SEO VPS hosting environments, where stable performance and secure data handling are essential.
VPN alternative – use dynamic forwarding as a lightweight encrypted proxy for secure browsing and traffic routing. This method is commonly used on crypto VPS servers, where secure and uninterrupted connectivity is critical.
Overall, SSH port forwarding is a powerful tool for secure communication, providing flexibility and control over how network traffic is routed and protected.
Step 1: Establish a Connection
The first step is to initiate a Connection Request between the Client and the Server. When a user or client wants to establish an SSH connection with a server, they kick off the process by sending a connection request to the server.
In response, the server configures and listens to requests on port 22 for incoming SSH connections. Further, it acknowledges and responds to the client's initiation.
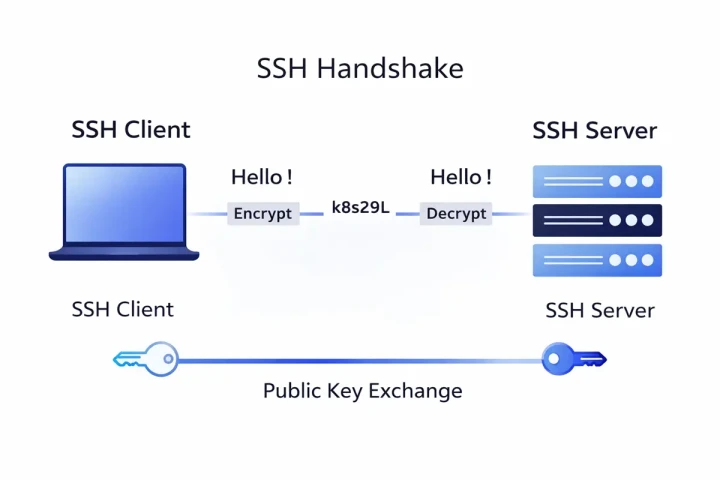
The client and server engage in an encryption handshake process, where both exchange information to establish a secure connection. To safeguard their subsequent communication, they collaborate on choosing encryption methods and exchanging cryptographic keys as part of this process. After this process, a shared secret key is generated that will be shared between both devices, a client as the user and the remote server.
Step 2: User Authentication
After following the step above, the client employs the chosen authentication method to verify its identity to the server. The primary methods for authenticating SSH users are through passwords and SSH keys.
Clients securely transmit encrypted passwords to the server. This could involve providing a cryptographic key, entering a password, or utilizing any other authentication method supported by SSH. Nevertheless, the security of passwords relies on the complexity chosen by the user. Making passwords, in some cases, is considered a risky authentication method.
However, passwords are generally considered less secure compared to the use of SSH public-private key pairs, which involve asymmetric encryption. In this process, the server grants the client system access once the client successfully decrypts the provided message using the appropriate key.
After the authentication process, a secure channel is established between the client and the server. This ensures privacy as all the information exchanged between them is encrypted, making it impossible for any unauthorized entities to eavesdrop or listen in on the communication.
Step 3: Establish a Secure Channel and Initiate the Session
Once the secure channel is established, an SSH session is initiated. Within this session, the client can securely interact with the server, performing tasks like sending files, executing commands, and undertaking other authorized actions.
All the commands, files, and data exchanged between the client and server during this session are encrypted and protected by the secure channel. This encryption ensures the integrity of the data, preventing any tampering or manipulation during data transfer.
When the user concludes the SSH session, they can close the connection. Closing the secure channel ensures that no further communication is possible until a new session is initiated.
The functioning of SSH on port 22 involves ensuring secure data transfer between the client and server, authenticating the client, and establishing a secure, encrypted communication channel. SSH is widely trusted and utilized for secure remote access and communication due to its implementation of encryption and secure authentication methods.
How to Generate an SSH Key?
SSH provides a secure way for users to execute commands on remote servers, facilitate port forwarding, establish tunnels, and perform various tasks. It supports multiple authentication methods, with password authentication and public-key-based authentication being among the most common.
Public-key-based authentication is widely considered more secure and convenient compared to password authentication, relying on digital signatures for enhanced security.
If you are using SSH key-based authentication, you can generate an SSH key on your Linux system using the following steps:
Step 1: Verify the Old SSH Key File
Begin by creating an SSH key on the Ubuntu client machine, which will be used to connect with the server. Before generating the SSH key, it's essential to check whether you already have an existing SSH key pair on your client system. This is important as it helps to avoid overwriting the old key pair with a new one. You can verify the existence of the SSH key file on your client machine by using the following command:
$ ls -l ~/.ssh/id_*.pub
Step 2: Generate an SSH Key Pair
If you encounter an error stating "No such file or directory," it indicates the absence of an SSH key on your machine. In such a case, proceed to the next step. Generate the SSH key pair on the Ubuntu client machine by executing the following command to create a new key pair with 4096 bits, using a user email address as a comment:
$ ssh-keygen
or
$ ssh-keygen -t rsa -b 4096 -C "useremail@yahoo.com"
Executing the command "ssh-keygen" as mentioned above, creates a default 3072-bit RSA key pair. To store the SSH key in the default location within the '.ssh/' sub-directory, simply press “Enter.”
Subsequently, you'll be prompted to enter a passphrase, adding an extra layer of security. However, keep in mind that you'll need to enter this passphrase each time you log in to a remote machine. If you prefer to leave it empty with the default setting, press “Enter.” Following this, the entire output screen will be displayed on the terminal as shown below:
Verify the successful generation of the SSH key pair on the client machine by using the following command:
$ ls ~/.ssh/id_*
The generated SSH key pair should be displayed on the terminal. It means you have successfully generated the SSH key pair on the Ubuntu client machine.
Step 3: Connect to the Remote Server
Next, transfer the generated SSH public key to the remote Ubuntu server you intend to manage. Utilize the "ssh-copy-id" tool, as it is the recommended method for copying the public key to the remote server. Execute the command provided below on the client machine to effortlessly copy the public key to your remote Ubuntu server:
$ ssh-copy-id user_name@server_IPaddress
Replace this server IP address with your system IP.
Upon your initial system connection, you may encounter several prompts in your terminal. Enter “yes” and then press “Enter” to proceed with the process. The server will examine and validate the SSH key previously generated on the client machine. You can also manually copy this generated SSH public key on a server using the following command:
$ cat ~/.ssh/id_rsa.pub | ssh username@serverip "mkdir -p ~/.ssh && chmod 700 ~/.ssh && cat >> ~/.ssh/authorized_keys && chmod 600 ~/.ssh/authorized_keys"
Again, change or replace the username and server IP with details of your server.
Step 4: Log in with the SSH Key on the Remote Server
To log in via SSH on the remote server, use the following command:
ssh username@serverIP
If you haven't set a secure passphrase for the private key, you can log in to the remote server immediately. In a different scenario, if you have set a secure passphrase, you will be prompted to enter it during the login process.
Step 5: Disable SSH Password Authentication
If you want to disable the SSH password authentication that adds an extra layer of security, before going to disable it, log in to your remote server with sudo privileges. Open the “/etc/ssh/sshd_config” SSH configuration file using this command:
$ sudo nano /etc/ssh/sshd_config
Now, navigate to the following line and set it with a “no” argument.
PasswordAuthentication no
Save this configuration file and exit from it.
After making changes, It’s time to restart or reload the SSH service on your server by running the following command:
$ sudo systemctl restart ssh
Ensure that SSH is working properly on your server before ending the current session. If everything is functioning as expected, it indicates that SSH password authentication is disabled on your server.
Commands to Manage the SSH on the Linux System
To install an OpenSSH server, use the following command:
$ sudo apt install openssh-serverTo start and stop the SSH service, use the following commands:
$ sudo systemctl start ssh
$ sudo systemctl stop ssh
To check SSH service status, whether it is running on your system or not, use:
$ sudo systemctl status sshTo enable an SSH service, use this command:
$ sudo systemctl enable ssh
To reload or restart the SSH service, run this command:
$ sudo systemctl restart ssh
To connect with the SSH server, use the command below:
$ ssh username@remotehost or IP-address
How to SSH into a Linux Server
Connecting to a Linux server via SSH is a fundamental task for system administrators and developers. SSH (Secure Shell) provides encrypted remote access to a server’s command line, allowing you to manage files, run commands, and configure services securely over a network.
Prerequisites
Before connecting, ensure you have the following:
- The server’s IP address or hostname
- A valid username (e.g., root or another system user)
- The SSH port (default is 22 unless changed)
- Authentication method: password or SSH key
Basic SSH Command
To initiate a connection, use the following command in your terminal:
ssh username@server_ipIf the server uses a non-standard port, specify it with the -р option:
ssh-p port username@server_ipSSH Key Authentication (Recommended)
For better security, it is recommended to use SSH key-based authentication instead of passwords. If you already have a private key, connect using:
ssh-i /path/to/private_key username@server_ipIf you don’t have a key pair, generate one with:
ssh-keygen -t rsa -b4096Then copy the public key to the server:
ssh-copy-id username@server_ipFirst Connection and Fingerprint Verification
When connecting to a server for the first time, SSH will prompt you to verify the server’s fingerprint. Confirming this step ensures you are connecting to the correct host and not a malicious intermediary.
Common Issues
- Connection refused – SSH service may not be running or the port is blocked
- Permission denied – incorrect credentials or misconfigured SSH keys
- Timeout errors – network issues or firewall restrictions
In summary, SSH provides a secure and efficient way to manage Linux servers remotely, and mastering its basic usage is essential for any server administration workflow.
Once you understand how SSH works, the next step is having a server where you can apply these settings in practice. A BlueVPS server can provide the flexibility needed for secure remote access and configuration.
How to Configure SSH Port Number 22 in Firewall UFW?
Make sure that the UFW (Uncomplicated Firewall) is turned on and active on your Ubuntu system. If it's not enabled, use the following command to enable UFW:
$ sudo ufw enable
Once the UFW is enabled, grant permission for SSH traffic on port 22 in the UFW firewall with the following command:
$ sudo ufw allow 22/tcp
If you want to disable the SSH server on your system, you can disable or block port 22 using the command below:
$ sudo ufw deny 22/tcp
To disable the SSH service access, execute the following commands:
$ sudo systemctl stop ssh --now
$ sudo systemctl disable ssh --now
SSH Implementations for Linux and Windows
Various SSH implementations and clients find widespread use across diverse operating systems:
- OpenSSH (Unix-Based Systems): OpenSSH serves as the default SSH implementation for Unix-based systems such as Linux and macOS. Renowned for its reliability and security, OpenSSH comes pre-installed on most Unix-based platforms.
- PuTTY (Windows): PuTTY is a popular SSH client designed for Windows. It offers a user-friendly interface for secure connections to remote servers. Additionally, PuTTY provides auxiliary tools like PuTTYgen for the management of SSH keys.
- SSH in PowerShell (Windows): In recent years, Microsoft integrated OpenSSH into Windows PowerShell. This integration simplifies the utilization of SSH for Windows users, eliminating the need for third-party applications.
What Is the Default SSH Port Number?
As we discussed earlier, SSH uses the default port 22. Every SSH connection initializes through SSH port 22. Using port 22 as the default simplifies the configuration for users and ensures a standardized approach to SSH connections.
But, in a few cases, it is considered unsafe to transfer crucial data. So, it is recommended to change the default SSH port number 22 to another port number due to some security problems.
The 65,536 communication ports are available for establishing a connection between devices. You can choose one of them if you want to change your SSH port number. This is a smart approach to prevent your servers from brute-force attacks.
How to Change the Default SSH Port 22 to Another Port Number?
If you're engaged in important communication that demands security, it's advisable to change the default SSH port number to reduce the brute-force attack risk. Since all attackers know that port 22 is the default SSH port number, it becomes a prime target for attacks, opening the door for hackers to access the data you provide. By utilizing a different SSH port, you can effectively employ the SSH protocol for enhanced security.
You need to follow the steps below to change the SSH port number 22 to another port:
Step 1: Create sshd_config File Backup
You can easily change the default SSH port by editing the port number in the sshd_config file. However, it is important to make a backup of your file before making changes to the configuration file. To create a backup, use the following command:
$ cp /etc/ssh/sshd_config /etc/ssh/sshd_backup_config
The above command will create a copy of this file in the same directory.
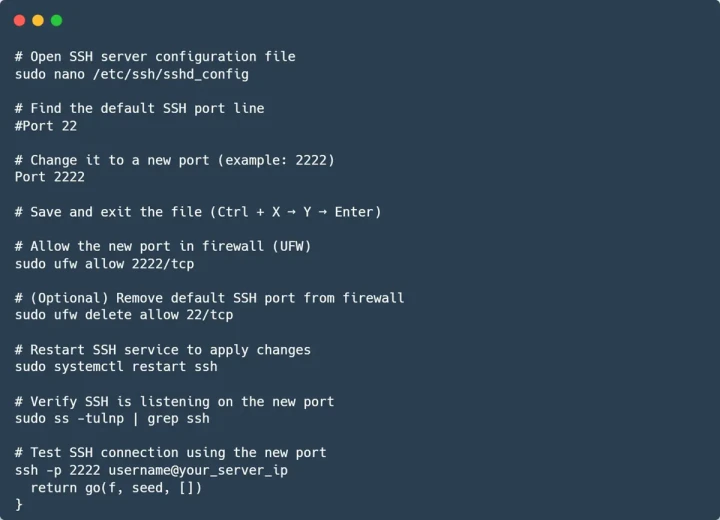
Step 2: Changing the SSH Default Port 22
To change the SSH default port 22, open the “ssh_config” file and run the following command:
$ sudo nano /etc/ssh/sshd_config
The above command will open this configuration file inside the terminal window in the nano editor. Find the below line of code:
#Port 22
Uncomment this line by removing the start “#” symbol and changing this port with another number. For example, we want to change the SSH port number to 45571.
Port 45571
It is important to allow or add this port to your firewall.
Step 3: Restart the SSH Service
After adding it to the firewall, restart the SSH service to load changes.
$ sudo service sshd restart
Once you restart your device, the modifications you made will take effect. Remember that a crucial security configuration involves changing the default SSH port number right after acquiring a Linux VPS. You can conveniently test these changes without needing to log out of your current SSH session.
Step 4: Test the SSH Port
Once you change the default SSH port 22, you will mention the port number while establishing a connection from the client machine to the server.
$ ssh username@userIP -p 45571
Now, your default SSH port has changed and is set to Port 45571.
Conclusion
In this article, we learned how SSH works on port 22 and how we can change the default SSH port to another port number. In addition, we executed different SSH commands that will help to give you an understanding of the SSH service and port number.
I hope that after reading this tutorial, you will be able to connect your system to an SSH server and that you can easily change the port number to protect your system from malicious users.
SSH Port FAQ
What is the default SSH port number?
The default SSH port number is 22. It is officially assigned for Secure Shell connections and used by most servers unless explicitly changed in the configuration.
What is port 22 used for?
Port 22 is used for SSH access, allowing secure remote login, command execution, and file transfers. It enables encrypted communication between a client and a server.
Is SSH TCP or UDP?
SSH uses TCP (Transmission Control Protocol). TCP ensures reliable, ordered, and secure data delivery, which is essential for remote administration. SSH does not use UDP.
How do I change the SSH port?
To change the SSH port, you need to modify the SSH server configuration file by specifying a new port number and then restart the SSH service. After that, firewall rules should be updated to allow connections on the new port.
What port does SSH use by default?
By default, SSH uses port 22. This standard configuration can be changed if needed for security or operational purposes.
Can I use SSH on port 443?
Yes, SSH can be configured to run on port 443. This is sometimes used to bypass network restrictions, as port 443 is commonly open for HTTPS traffic. However, it requires proper configuration on both the server and firewall.