How to Create User in Postgresql? (postgresql create user)
With the ever-growing need to manage large volumes of data, database systems continue to evolve. PostgreSQL stands out as one of the most reliable and high-performing solutions available today, widely adopted for both small and large-scale applications.
This step-by-step guide will walk you through postgresql create user or how to create user in Postgresql. We will also cover how to install a PostgreSQL server on Ubuntu using Docker.
What is PostgreSQL?
PostgreSQL is a powerful, open-source object-relational database management system (ORDBMS) known for its performance, data integrity, and flexibility. It’s a popular choice for developers and enterprises because of its stability and extensive feature set.
PostgreSQL adheres to the ACID principles—atomicity, Consistency, Isolation, and Durability—which ensure reliable transactions even in the face of system crashes or unexpected failures.
Key Features of PostgreSQL:
- Advanced support for geographic data with indexing and spatial queries
- Built-in support for data replication
- A strong, role-based access control system
- Full-text search capabilities
- Multi-Version Concurrency Control (MVCC) for efficient transaction handling
- Flexible key-value storage support
Prerequisites
Before getting started, ensure you have the following:
- A system running the latest version of Ubuntu
- Docker is installed on your machine (refer to Docker’s official documentation if needed)
- Your user account should belong to the Docker group, allowing you to run Docker commands without needing root privileges every time.
How to Create User in PostgreSQL: Step-by-Step Guide
To create a new user (or role) in PostgreSQL, we’ll start by setting up a PostgreSQL instance inside a Docker container. Once the container is running, we’ll connect to the PostgreSQL server using the psql command-line tool and proceed with creating and managing roles—all from within the Docker environment.
Step 1: Set Up PostgreSQL Using Docker
The easiest way to get PostgreSQL up and running is by using the official Docker image maintained by the PostgreSQL community.
You can launch a container with the following command:
docker run --name postgres_db -e POSTGRES_PASSWORD=mysecretpassword -d postgresReplace mysecretpassword with a strong, secure password of your choice. For example:
# docker run --name postgres_db -e POSTGRES_PASSWORD=password123 -d postgres
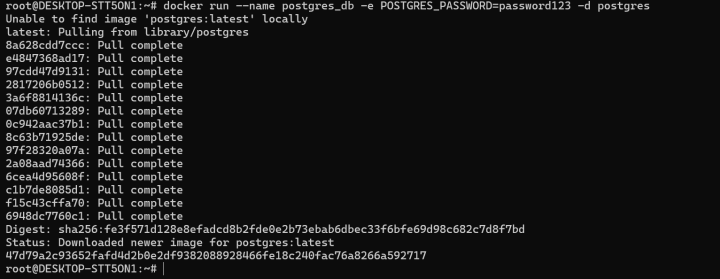
This command pulls the PostgreSQL image (if not already downloaded) and starts a container with a default user named postgres who has full superuser privileges.
To verify that the container is running properly, use:
# docker ps

This will list all active containers, including your PostgreSQL instance.
Step 2: Access PostgreSQL via psql
Once your PostgreSQL container is up and running, you can connect to it using psql, which is the built-in PostgreSQL interactive terminal.
Use the following command to access the psql shell inside the container:
# docker exec -it postgres_db psql -U postgres

Here:
- docker exec allows you to run commands inside a running container.
- -it enables interactive mode.
- -U postgres specifies that you want to connect as the postgres user.
Once inside the PostgreSQL shell, you can list all existing roles using:
\du
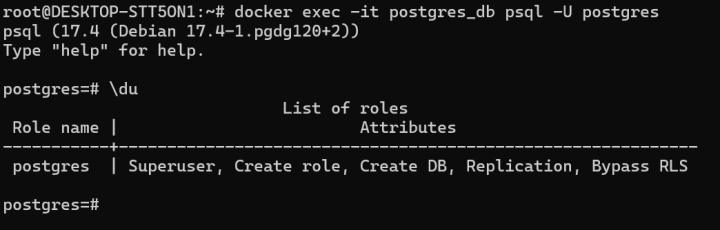
This will display a list of roles (users) along with their assigned privileges.
Important Note: PostgreSQL uses the term role to refer to both users and groups. A role can have login privileges (like a user), or it can act as a group that other roles can inherit permissions from. Essentially, roles serve as the access control mechanism in PostgreSQL.
Step 3: Create a New User in PostgreSQL (psql create user)
In PostgreSQL, a user is just a role that has permission to log in. You can create it using the CREATE USER command, which automatically includes the LOGIN privilege.
For example, to create a user named editor with a password:
CREATE USER editor WITH PASSWORD 'password123';
To verify that the user was added successfully, run:
\du
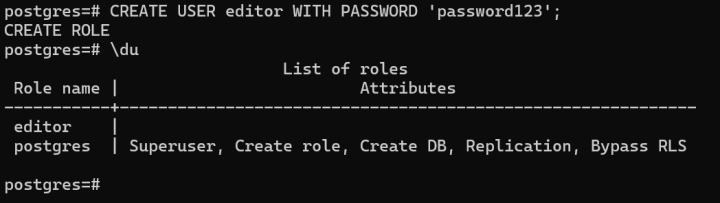
This will list all roles and their assigned permissions. The editor user will appear in the list with default settings.
Step 4: Grant Additional Privileges
Once the user is created, you can assign extra permissions. For instance, to allow the editor user to create new databases, run:
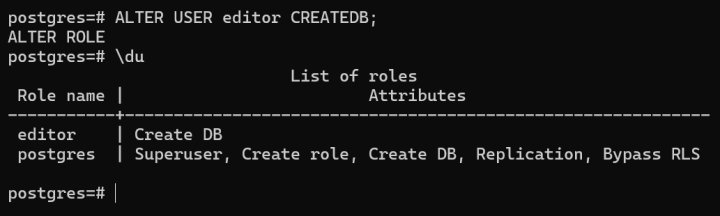
ALTER USER editor CREATEDB;
Use the \du command again to confirm that the CREATEDB privilege has been applied.
Step 5: Switch to the New User
You can switch your session to act as the new user with:
SET ROLE editor;
Since this user now has permission to create databases, you can try creating one:
CREATE DATABASE articles_db;

Conclusion
This tutorial showed how to run a PostgreSQL container using Docker, create a new user (editor), assign database privileges, and use the role to manage databases. For more advanced configurations, be sure to explore the official PostgreSQL documentation.
Bluevps offers instant KVM VPS setup across 20 global locations, ensuring your virtual server is ready to go within minutes. Whether you're deploying on Linux or Windows, you get full flexibility with a range of control panels and 100% dedicated resources guaranteed through KVM virtualization. This ensures consistent performance and complete isolation for your environment.
With convenient remote access and control, managing your VPS is simple and efficient, no matter where you are. Plus, Bluevps backs you with 24/7 customer support, making it a reliable choice for developers, businesses, and hosting enthusiasts. Choose Bluevps.com for high-performance, secure, and instantly available VPS solutions worldwide.
Blog